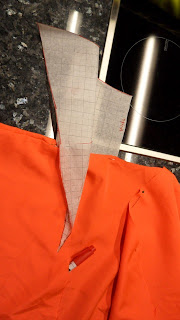
First up I took the front upper half coat pattern and pinned it together with the back pattern to see if the neck cut matched with the front's shoulders or not. It didn't.
 |
| After I cut them to fit |
 |
After I had sewn what was neccessary to hold the thing together it looked like this. Not too bad.. if I do say so myself.
 |
| Face censor ftw. The two pins are there as collar markers. |
Next up was time to figure out the collar. It took some thinking before I felt sure enough to draft a pattern. The pattern looked like this:
But the collar would need to have a strip of extra fabric added to the front, extending towards the coat's opening. Masamune's collar kind of starts already on the coat's V-shaped front and folds a bit out. I don't know how to explain clearly what I mean but on this anime pic it's pretty obvious:
So I went and took the front pattern piece, pinned it along the curve to a small piece of pattern paper and drew out the curve. I put the collar pattern temporary on top for reference and to get the starting point (aka 11 cm from the collar's middle) right.
After that I pinned the collar pattern (it's only half pattern, will be cut at the fabric fold) along with the extension piece to the test coat, to see if it would sit like I had imagined. Of course I pinned the collar's "end" (actually middle point) to the middle back of the coat and then just pinned along the neck curve and when I got to the front I pinned the extension piece along the coat's front curve. It sat really well.. I was surprised haha.
 |
| Straight... |
 |
| .. and slightly folded. |
 |
| As you see I just sew the collar on with a straight stitch just like the shoulder and side seams earlier. No need to do extra work. |
It looked something like this when worn after being sewn on:
 |
| Not half bad. The collar is a bit too wide but otherwise it seems to work. Super floppy fabric though, so the real collar will need interfacing too. |
The prototype coat looks like this when on a flat surface:
I took the collar pattern and made it a little bit less wide.. I don't want a huge Dracula collar lol.
 |
| Drew a line with a pencil where I will cut |
 |
| After fixing the size. Put it over the collar for comparison. (prototype collar has about 1 cm seam allowance though) |
That's all progress for today.. ~


