Showing posts with label progress. Show all posts

Pokéballs! + Falkner progress

Earlier today I decided to check if I could find my old candy container Pokémon figure pokéballs.. and I did. Now I at least have some kind of fitting prop to go with my Falkner cosplay, yay! It's kinda hard to come up with poses when you don't have props.. I also decided that if Jäätynyt Enkeli and Sairu-chan want to borrow a pokéball I'd lend them one each so that we all would have different but still matching pokéballs!


I thought that Jäätynyt Enkeli could use the Lure Ball (left) because it's.. well, blue, and kinda similar to a Great Ball which Silver has in this official art. Also it was introduced in Gen 2 of Pokémon so it kinda fits. Sairu-chan could borrow the Repeat Ball (middle) because it has the same color scheme as Erika whom she will cosplay. I would use the Heavy Ball (right) because it was also introduced in Gen 2 of Pokémon and it fits Falkner's color scheme somehow too.

Today I also finished Falkner's kimono style shirt. Not so much to say because it's really simple and straight-forward. I took some few pictures though.

I hemmed the arm openings, nothing special.
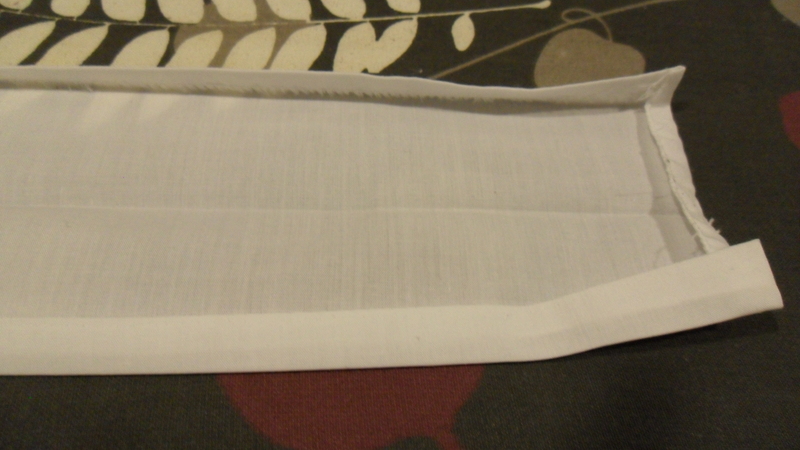
Cut out the collar pieces, sewed them together at one end so I got one long piece and ironed it.
Pinned the collar in place and started sewing..
Collar done
After I had hemmed the bottom. Finished.

That's it for today. One part of the cosplay finished, yay! And I love how my camera fucks up the colors. None of these pictures show the real color of the fabric, trolololo.
Hopefully soon I'll start sewing Falkner's mini hakama.

Falkner wig

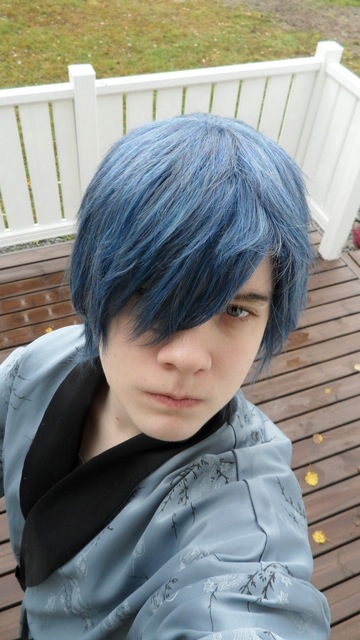
On Monday this week I went to the post office and picked up my Falkner wig. It arrived some days earlier but I couldn't go get it then. I didn't have time to open and try it on until recently but I must say I love the color; it's this awesome mix of a lot of different colored fibers like different shades of blues and grays.
The bangs could have been a bit longer but I don't mind because they're good enough (aka they cover my eye) and I was expecting them to be a bit shorter than what the character has anyway because this wasn't a wig specifically meant for Falkner or anything. XD

Now some try-on photos. I woke up pretty recently so I look like a mess.. oh, and I'm wearing my silk robe as usual.. I'm always wearing it on mornings and some hours before going to sleep. lol


Outdoor light
I don't feel a need to style it because it looks pretty good as is. It is very easily fluffable too so I can arrange the fibers, tease them and have them keep the wilder style without falling flat directly. I'm wondering though, should I roll with black eyebrows (like on photos) or should I go get something blue instead? I think black seems to look just fine but.. I'm not 100% sure.

Shinsengumi headband modification + stuff

I went to town today on the morning together with Jäätynyt Enkeli. First thing we did was that we went to his study apartment and ordered the train tickets for Närcon Vinter. Yay finally it's out of the way... sadly we couldn't get the Närcon discount herpderp. Oh well, after that we walked to the post office and I picked up the black ponytail clip-on I had ordered from eBay a month ago. It sure took its time to get here. ._. Better late than never... it was from China but still, never taken this long before for anything I've ordered to arrive.. except that one wig that got lost lol, I got a replacement wig though free of charge. I must say that when I got the package in my hand I was... weirded out. My first thought was "is this now the right thing I ordered? It can't possibly fit into this... ó_ò" and then I started imagining all possible more or less bad scenarios. xD Oh well, I put it in my bag and went back inside the shopping center (post office is on the outside of the same building). When inside I remembered I needed to buy some cosplay make-up, namely some good concealer/foundation/whatever-stuff-to-cover-derpness-on-your-face (I'm soooo knowledgeable when it comes to make-up terms.. lolnope) because yeah, powder alone just doesn't really cut it and the one thing I have is just... well.. it takes forever to dry and doesn't fit my skin tone - first I look like Simpsons and then I look like I have airdried poo on my face.
So I wobbled into the make-up specialized store like "herpaderp I know like almost nothing about this shit -and I wouldn't put my foot in here unless my nerdy hobby called for it- but I need some stuff that gives me this effect herpaderp". Yeah, go figure. Luckily I got some guidance to some kinda promising concealer which I decided to give a try.. but the price wasn't as yummy: 25 €. My poor wallet cried tears of blood. *pats it*


I'm happy I only use make-up for cosplays...  

When I got home I took out the package. It's sooo tiny!

package in size comparison with normal (bigger) scissors...
... but sure there was my ponytail clip-on in there!
It was tightly rolled inside. I must say I was surprised. XD I took it out and it unrolled like WROOM and I was all "mistä tämä pituus oikein tulee? : DD" no ei Saunalahdesta ainakaan. Highly space effective way of packaging lol.

Now over to the progress part. You might or might not remember that I did a shinsengumi headband quite some time ago. Yeah, I never wore it to a con because I noticed it derped. It was a bit too wide to wear on your forehead with a wig. It would look derp.. or at least on my face it did. Also the craft foam protector part thingy creased when bent and the glue didn't hold it super securely in place. So I've been thinking about modifying it for a long time and today it was time for it to finally get a long awaited make-over.

First things first. Rip off the craft foam part.
It left some glue remains.. not sure if gusta.
I then took the seam ripper and unstitched the whole thing open again. I didn't want to cut any fabric because who knows, I might need the extra fabric someday later if I want to resize the width again.
When I had unstitched the whole thing I wondered what to make the forehead protector part out of; I wanted something that was glossy and would bend with the fabric... and so my mind went to the roll of pvc fabric my mom has. "Why not?" I thought and went ahead to try. Oh boy little did I know what hell awaited me...

After cutting out a fitting piece of pvc fabric
I went to iron the headband itself, this time folding in the sides twice to get it thinner and after I just resewed it shut again.

Double folded and ironed sides before sewing.
Sewn shut.
And now to attach the pvc piece to the middle. I just thought that it would be easy peasy to sew on. The first few stitches went all good and I was positive it would work so I continued sewing. I noticed very soon that every second stitch I had to lift the presser foot because the fabric wanted to turn to the side and crease and fold up under the presser and ahgjfdskjadskgj. But I continued sewing... and when I was almost done with the upper part I finally noticed that the whole thing had turned into a fucking drunk banana crooked beyond all points of hope!!

"Tell me again how you were supposed to be a headband..."
(yes, that's the default form it took if I tried to lay it flat, go figure)
I raged silently for myself and here comes the seam ripper. But sweet Jesus! Dx The stitches were so small it was impossible to rip them up because the seam ripper's.. rip.. point.. thing.. seemed gigantic in comparison. OTL So I tugged the pvc fabric upwards and somehow, slowly, managed to unstitch it. But the hand position I had to keep hurt like fuck and it felt like my thumb muscles or something would disintegrate when I was done. Needless to say my feelings were nothing less than..


If you didn't figure it out already - I left it unfinished.
Maybe another day I'll finish that sucker up... now it can just go and... sew itself goddammit.

Sakabatou + Kenshin make-up test

Today I got a sakabatou sword from one of my best friends. She had planned to use it for her own Kenshin cosplay originally but the sword is pretty... damaged/derp/I don't even... so she wants a new one and when I told her I will cosplay Kenshin this year and have everything else ready except the sword, well, I got it. xD It doesn't have the same tsuba and stuff like Kenshin's sword but it is reverse bladed so it's okay. I've been trying to figure out if there is any way to fix the many errors it has but I'm drawing blanks. It seems to be constructed very weirdly (read: not like your usual katana) and it also seems there is no way of taking it apart to reassemble it and check where the faults are. *shrugs* Oh well, it looks decent half-way out of the sheath but if I draw it I will have to check so that it doesn't go major herpaderp.

le sword ~
Oh, and because I now have everything I need for Kenshin I decided to try on the wig for the first time and do some kind of quick make-up test. Also did the scar but I didn't make it looks as deep as that scar test a few days ago; I didn't have patience enough to make it awesome just to take some test photos. I'll do the scar better for the con of course. This was also for experience... I must say it felt a little bit different having Rigid Collodion on your face compared to having it on your forearm. I was more aware of that it was there because I noticed I couldn't smile too much and such or I'd risk screwing up my scar. Good to know before the con. Guess I'm gonna be a pretty serious Kenshin..

I'm not sure if I suit him though.. it was hard to do happy/cute Kenshin-like expressions, I kept looking like I was about to kill someone maybe I should just settle for Hitokiri Battousai LOL and when I tried to look happy I looked way too derp. When I tried to look cool I ended up doing expressions Sanosuke would do rather than Kenshin, dafuq man. OTL

Oh well, here's my first try!  
I was lazy doing the base make-up.. mostly just focused on eyeliner and the scar.


Eye close-up
Scar close-up
My wig doesn't have a thick ponytail currently. I think I might add some volume to it later.. I don't really have time to do it right now (and I need to save money haha... ha...) so this cosplay will be upgraded sometime after its debut.

Also before I put the cosplay on I noticed I had nothing at hand that I could use to make my eyebrows orange. But then I remembered that back when I started cosplaying and did Ichigo Kurosaki from Bleach, who also has orange hair in about the same shade, that I didn't color my eyebrows either lol well back then I didn't even know you could do that and it looked surprisingly okay. I'm not sure if I should still opt to color them though... any opinions?

Oh, and before I say goodbye for today I must share with you this..

... BONUS PHOTO!

KAORU-DONO NOOOOOOOOOOOOOOOOO
That's all for today.
Stay tuned for a possible Kenshin preview photoshoot during the coming weekend!

Ponytail clip-on test

Remember that ponytail clip-on I mentioned in the last post? Well, I decided to try it on together with my Sebastian/Hijikata/whatever wig to see what it looked like when worn. Ignore my lack-of-everything face. herpderp


Actually I noticed that the wig is a very dark brown-black and not full black like I had thought at first; the ponytail is black but luckily the color differences aren't disturbingly noticeable. Personally I don't really mind at least not yet xD that the colors don't match perfectly... it's understandable seeing the wig and ponytail are from different eBay sellers and wig colors are hard to match perfectly anyway. The difference is a bit noticeable when both wig and ponytail are hit by the light at the same time but otherwise okay. It will do just fine for me.

I will use this for Toshizo Hijikata's first season version from now on at cons, I think,  because it's easier to care for. That longer wig I will save for private photoshoots and when I do his calendar version. Also this combination works for another character I have in mind too, but I won't reveal that one just yet ~

Masamune coat test + collar

I've been inspired to work on cosplays the last two days so here's finally more Masamune progress. I really need to work more actively on this.. before I know it it's going to be summer and d'oh! xD Must stop procrastinating.. it's the bane of my existence lol.

First up I took the front upper half coat pattern and pinned it together with the back pattern to see if the neck cut matched with the front's shoulders or not. It didn't.

After I cut them to fit
After this quick fix I did a prototype version of the coat's upper half of some scrap fabric we had at home. Nothing special, just cut out the pieces needed.


 Because this is just a kind of test, to see how the real thing will fit/look, I didn't bother to zigzag or do anything except sew the shoulder seams and side seams closed with a simple straight stitch. This is just a scrap test anyway, just to see how well my self-made patterns work or not when assembled.
After I had sewn what was neccessary to hold the thing together it looked like this. Not too bad.. if I do say so myself.

Face censor ftw.
The two pins are there as collar markers.
The shoulders will need some hardcore interfacing on the real coat to stay up like on the reference but the form seems to be otherwise quite alright.

Next up was time to figure out the collar. It took some thinking before I felt sure enough to draft a pattern. The pattern looked like this:


But the collar would need to have a strip of extra fabric added to the front, extending towards the coat's opening. Masamune's collar kind of starts already on the coat's V-shaped front and folds a bit out. I don't know how to explain clearly what I mean but on this anime pic it's pretty obvious:


So I went and took the front pattern piece, pinned it along the curve to a small piece of pattern paper and drew out the curve. I put the collar pattern temporary on top for reference and to get the starting point (aka 11 cm from the collar's middle) right.


After that I pinned the collar pattern (it's only half pattern, will be cut at the fabric fold) along with the extension piece to the test coat, to see if it would sit like I had imagined. Of course I pinned the collar's "end" (actually middle point) to the middle back of the coat and then just pinned along the neck curve and when I got to the front I pinned the extension piece along the coat's front curve. It sat really well.. I was surprised haha.

Straight...
.. and slightly folded.
Green lights! Time to cut out a prototype collar for the coat to see if it works as well with fabric..

As you see I just sew the collar on with a straight stitch just like the shoulder and side seams earlier.
No need to do extra work.
It looked something like this when worn after being sewn on:

Not half bad. The collar is a bit too wide but otherwise it seems to work.
Super floppy fabric though, so the real collar will need interfacing too.
 The prototype coat looks like this when on a flat surface:


I took the collar pattern and made it a little bit less wide.. I don't want a huge Dracula collar lol.

Drew a line with a pencil where I will cut
After fixing the size. Put it over the collar for comparison.
(prototype collar has about 1 cm seam allowance though)
That's all progress for today.. ~